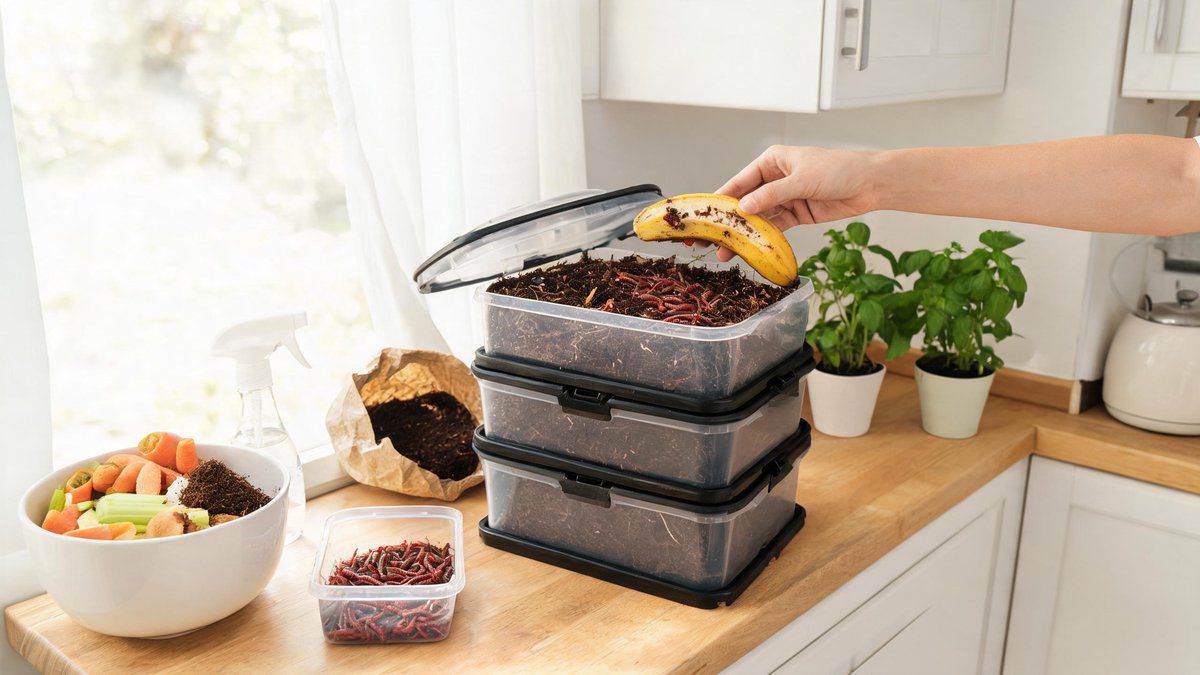
Why Worm Composting Gives You Richer Soil Faster
Worm composting, or vermicomposting, isn't just about breaking down kitchen scraps. The real magic happens inside the worm's gut. As red wigglers digest your banana peels and coffee grounds, they coat the waste with beneficial microbes and enzymes. The result is a nutrient-dense material called castings that holds its own against any store-bought fertilizer. Studies show worm castings can contain 5 times more nitrogen, 7 times more phosphorus, and 11 times more potassium than typical topsoil. That's a concentration you simply won't get from a passive outdoor heap.
These numbers don't just look good on paper. When you mix even a 10% ratio of castings into your potting mix, seed germination rates often jump by 30% or more. Plants develop stronger root systems and show better resistance to pests. The humus-like structure of castings also improves soil aeration and water retention. Think of it as a slow-release multivitamin for everything you grow. If you've ever struggled with lackluster tomatoes or leggy seedlings, worm compost is your shortcut to healthier plants without reaching for synthetic chemicals.
The practical takeaway here is simple: you don't need a sprawling backyard to create black gold. A single 10-gallon bin tucked under the kitchen sink or in a laundry room can process up to 6 pounds of food waste per week. That's roughly the amount a family of two produces in vegetable scraps. By keeping the process indoor, you skip the trips to a cold outdoor bin in February. You get castings in a third of the time a traditional pile takes.
Choosing the Right Bin and Worms (No Guesswork)
You'll hear about fancy stacking tray systems and continuous-flow bags. While those work, you can build a fully functional bin for under $30. Start with two 10-gallon opaque plastic storage totes. Drill ten to twelve ¼-inch holes in the bottom of one tote for drainage, and a dozen holes around the top edge of both for airflow. Nest the drilled tote inside the solid one, leaving a gap to catch any liquid (called leachate). If you'd rather buy, a simple single-tray worm factory costs around $70 and suits most beginners. Avoid clear bins—worms hate light, and darkness keeps them feeding near the surface where you can observe them.
Design Tip: The National Fire Protection Association reports that dryers cause 13,000+ house fires annually, 34% from un-cleaned lint traps. Clean the lint screen before every load and deep-clean the vent yearly.
Worm choice is even more critical. Don't dig up nightcrawlers from the garden. Those deep-burrowing worms need compact soil and won't survive in a shallow bin. You want Eisenia fetida, the red wiggler. These surface-dwelling worms tolerate temperatures from 55°F to 77°F and reproduce rapidly. A pound of red wigglers (about 1,000 worms) consumes 0.5 to 1 pound of scraps daily once they're established. Order online from a reputable bait shop or worm farm. Look for lively, moist worms with no foul odor. If they arrive sluggish, give them a day in fresh bedding before you judge.
The takeaway: don't overthink the container. A DIY tote with adequate ventilation and darkness outperforms many expensive models. Spend your money on healthy red wigglers instead. Aim for a density of 1 pound of worms per square foot of surface area. That gives them enough room to feed and breed without crowding, which keeps the bin productive for months.
Setting Up Your Worm Bin in 20 Minutes
Preparation is fast. Grab a stack of non-glossy newspaper or plain cardboard. Shred it into one-inch strips—you'll need enough to fill the bin about two-thirds full. Avoid paper with colored ink or plastic windows. Soak the bedding in a bucket of water for a few minutes, then wring it out until it feels like a damp sponge. It should release only a drop or two when squeezed. Spread the fluffed bedding evenly in the drilled bin. Sprinkle a handful of gritty material like fine crushed eggshells, a dusting of clean sand, or rock dust across the top. Worms don't have teeth; they use grit in their gizzards to grind food.
Now introduce your worms. Gently place them on the surface and leave the lid off for an hour under a bright light. They'll burrow down to escape the light, which helps them settle into their new home. After that, add a thin layer of food scraps buried in one corner, then cover everything with a damp piece of burlap or a sheet of plastic. This maintains moisture and encourages the worms to explore. Set the bin in a spot where temperatures stay between 60°F and 70°F—a basement, heated garage, or kitchen cabinet all work. Avoid direct sunlight and drafty areas.
In about 20 minutes, you'll have a thriving ecosystem. Check moisture by squeezing a handful of bedding weekly. If it's dry, mist it with non-chlorinated water. If it's soggy, leave the lid ajar and add dry shredded paper. That simple habit prevents over 80% of beginner problems. You'll know the bin is happy when you spot tiny lemon-shaped cocoons after 30 days—each contains up to 3 baby worms.
Feeding Your Worms: What Goes In—and What Stays Out
Think of your worm bin as a vegetarian pet. It thrives on a narrow menu. Feed scraps like apple cores, lettuce leaves, coffee grounds (with the paper filter), crushed eggshells, and cucumber peels. Chop everything into thumb-sized pieces to speed up decomposition. Worms process smaller bits up to 40% faster than large chunks, so that extra minute with a knife pays off. Always bury the food an inch under the bedding to stop fruit flies and odors. Rotate feeding spots around the bin each time, and don't add more until the previous meal is nearly gone. A well-managed bin shouldn't smell like anything except earthy forest floor.
Some items create chaos. Never add meat, dairy, oily foods, or bread. These rot anaerobically, attract pests, and can turn your bin sour in a matter of days. Citrus and onions are debatable—too much acid and strong sulfur compounds can bother sensitive worms. If you want to use them, freeze the scraps first, thaw, and add very sparingly with a generous dose of crushed eggshell to balance pH. Also skip pet waste unless you're using a separate, dedicated system designed for pathogen breakdown.
The feeding rule: when in doubt, leave it out. A worm's metabolism doubles for every 10°F rise within its comfort zone, so in summer you'll feed more often—up to twice a week. During colder months, cut portions by a third. If you overfeed, the bin generates heat and ammonia. You'll notice worms retreating to the sides. Stop feeding, aerate the bedding with a gentle fluff, and wait a week.
Simple Harvesting: How to Separate Castings from Worms
After 3 to 6 months, the bedding will look dark and crumbly, and the volume will have shrunk by nearly half. That's your cue to harvest. The simplest method doesn't require any sorting. Push the entire bin's contents to one side. Fill the empty half with fresh moistened bedding and a few favorite food items like melon rinds or coffee grounds. Over the next 2 weeks, most worms will migrate to the new side on their own. Then scoop out the castings-rich material from the old side, checking for stragglers. You'll recover over 90% of the worms this way without touching a single squirming body.
If you're impatient, try the light method. Dump small mounds of bin contents under a bright lamp on a plastic sheet. Worms burrow down to escape the light while you brush off the outer layer of castings every few minutes. Gather the worms and return them to freshly prepared bedding. Either approach gives you pure, black granular fertilizer that's ready to use immediately. Store excess castings in a breathable burlap sack in a cool, dark place for up to a year without losing microbial life.
The takeaway: harvest when the bin looks more like dirt than paper. Use the bait-and-switch migration trick to save time. Apply castings directly to houseplants (a tablespoon per 6-inch pot per month) or blend into seed-starting mix at 20%. You'll see greener leaves and thicker stems within two weeks.
Troubleshooting 5 Common Worm Bin Problems
1. Foul odor. This almost always means too much food or moisture. Stop feeding, fluff the bedding, and add dry shredded paper. If the smell lingers, remove any uneaten scraps and replace a third of the bedding. A healthy bin should have no odor.
2. Fruit flies. Bury food completely and keep a fly trap nearby—a small jar with apple cider vinegar and a drop of dish soap works wonders. Freezing scraps for 48 hours before adding them kills any eggs that hitchhike on banana peels.
3. Worms escaping. Check moisture and acidity first. If the bin is too wet or acidic (often from overfeeding citrus), add pulverized eggshells and fresh dry bedding. Also verify the temperature. Worms climb when the bin exceeds 85°F or dips below 40°F for extended periods.
4. Moldy food. A little white fuzz is normal and actually helps decomposition. But if mold covers the whole surface, you're feeding more than the worms can handle. Scoop it out, cut portions by half, and wait longer between feedings.
5. Tiny white creatures. You'll likely see springtails and mites swimming in the bin. They're beneficial decomposers, not pests. Their numbers explode only when conditions are too wet. Reduce moisture and remove any starchy scraps to bring populations back in balance.
Each of these issues self-corrects with two actions: moderate feeding and consistent moisture control. In a survey of 500 home vermicomposters, 78% reported that balancing moisture eliminated their primary odor or pest problem within a week. Keep a spray bottle of dechlorinated water and a stash of dry cardboard nearby, and you'll rarely lose a bin.