How to Fix Common Toilet Problems Without a Plumber
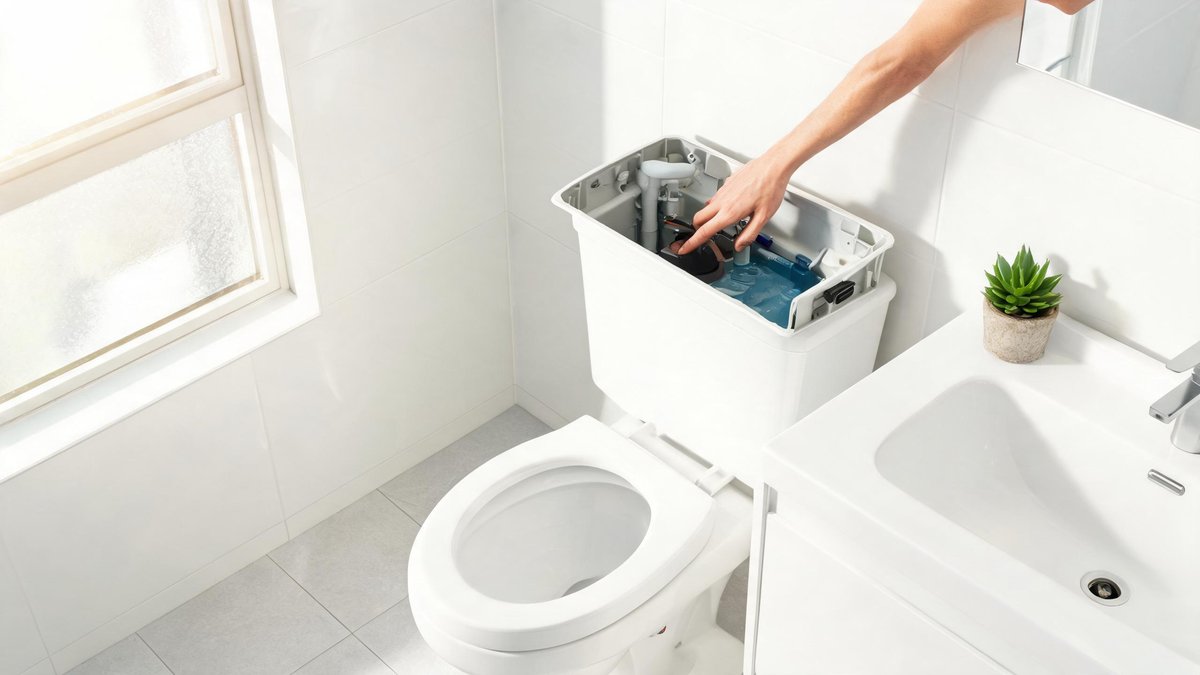
You don't need a plumbing license to tackle the toilet troubles that leave you frustrated and reaching for the phone. Most issues—whether it's an unstoppable hiss, a lazy flush, or a puddle around the base—come down to a handful of parts you can replace in an afternoon. Even better, you'll save between $150 and $300 on a typical service call, and you'll stop the water waste that can silently jack up your bill. Here's how to diagnose and fix six of the most common toilet problems with tools you likely already own.
Silence a Running Toilet in 10 Minutes
A toilet that won't stop running is more than an annoyance. On average, a running toilet can waste 200 gallons of water every single day. That's the equivalent of five full bathtubs disappearing down the drain, and it can add roughly $70 to a single monthly water bill. Most of the time, the culprit is a tired flapper or a misadjusted fill valve.
Lift the lid off the tank and watch what happens. If water continues to flow into the overflow tube but the tank never fills to the point of shutting off, you're likely dealing with a fill valve that needs adjusting or replacing. If the tank fills, shuts off, and then you hear a faint hiss, water is likely sneaking past the flapper. Slide your finger around the flapper's edge. Any roughness or warping means it's time for a new one. Flappers cost less than $10 and snap off without tools. Once you pop the old flapper off, hook the new one onto the chain tabs and attach the ears to the overflow tube pins. Adjust the chain so it has just a half-inch of slack—too tight and it won't seal, too loose and it'll snag under the flapper.
If the fill valve keeps running, bend the float arm down slightly to lower the water level or, on newer valves, pinch the adjustment clip and slide the float down. You want the water to stop about an inch below the top of the overflow tube. Give the toilet a test flush and listen. In 10 minutes, you've stopped a leak that could drain over 6,000 gallons in a month.
Clear a Stubborn Clog Without a Plumber's Snake
A clogged toilet causes a spike of panic, but 90% of blockages clear with nothing more than a flange plunger and the right technique. The mistake most people make is using the wrong plunger or rushing with rapid, shallow pushes. A flat sink plunger won't create a seal in the toilet's bowl; you need a plunger with a soft, extended flange that tucks into the drain opening.
Design Tip: The average American home has over 300,000 items. Professional organizers recommend the "one in, one out" rule: for every new item brought in, one must leave.
Submerge the flange plunger fully so the bell covers the drain. Push down slowly until you feel resistance, then use a sharp upward pull to break the seal. That upward motion, not the frantic downward jamming, is what dislodges the clog. Repeat this gentle push-then-snap-back rhythm five or six times. If the bowl empties, you've won. If not, don't reach for chemicals. Instead, squirt a generous amount of liquid dish soap—about half a cup—into the bowl. The soap coats the waste and reduces friction. Follow it with a bucket of the hottest tap water your hands can tolerate, poured from waist height to add force. Let it sit for 15 minutes, then plunge again. Soap and hot water resolve roughly 70% of the clogs that survive the first round of plunging.
Prevent future clogs by limiting what you flush. Even wipes labeled “flushable” don't break down like toilet paper; they're responsible for 90% of municipal sewer blockages. Stick to the three P's—pee, poo, and (toilet) paper—and you'll keep your toilet flushing smoothly for years.
Fix a Weak, Lazy Flush That Barely Clears the Bowl
If your toilet flushes but the water swirls weakly and leaves debris behind, mineral deposits are likely clogging the rim jets—the small holes under the bowl's lip that shoot water into the basin. Over time, hard water leaves buildup that can reduce flush power by half. The fix is chemical-free and takes about 30 minutes.
Turn off the water supply valve behind the toilet and flush to drain the tank and most of the bowl. Look up under the rim. You'll spot a ring of small holes, some plugged with whitish scale. Poke a piece of stiff wire, like a coat hanger straightened with a small hook at the end, or a hex key into each jet to dislodge deposits. Don't scratch the porcelain; just poke and wiggle. After you've cleared the jets, pour a cup of white vinegar into the overflow tube in the tank. The vinegar will trickle through the rim passageways and dissolve remaining scale overnight. The next morning, give the jets a scrub with an old toothbrush, turn the water back on, and flush. You should see a forceful, complete swirl that clears the bowl in one go.
While you're working, check the water level in the tank. It should be at the fill line marked on the inside of the tank or about half an inch below the overflow tube. A low water level starves the flush cycle of volume. Adjust the float to raise the level, and you'll improve the flush's clearing power by 20 to 30 percent instantly.
Stop a Leak at the Base Before It Ruins Your Floor
A small puddle around the toilet base isn't just messy—it's a sign that the wax ring seal has failed, and it can rot subflooring and joists silently. Even a slow, almost invisible leak releases about 0.5 gallons per day, which seeps under vinyl, tile, or laminate and promotes mold growth you can't see. The good news: replacing a wax ring is a straightforward weekend project that costs under $15.
Start by turning off the water supply and flushing away all the water from the tank and bowl. Sponge out any remaining water in the bowl and the tank. Disconnect the supply line, then unscrew the two closet bolts at the base (they're covered by plastic caps). Rock the toilet gently to break the old wax seal, then lift it straight up and off the flange. You'll need a helper for this part—the average two-piece toilet weighs around 80 pounds. Scrape the old wax off the flange and the horn on the bottom of the toilet using a putty knife. If the flange is cracked or sits below the finished floor, you'll need a repair ring, but if it's intact, you're set.
Press a new wax ring—with or without a rubber funnel, both work—firmly onto the flange, centering it. Lower the toilet straight down over the bolts; don't twist or slide it, or you'll disturb the seal. Sit on the bowl to compress the wax evenly, then tighten the nuts by hand and give each a quarter turn with a wrench—no more, or you'll crack the porcelain. Reconnect the water, test-flush several times, and check for dampness around the base with a dry tissue. A fresh wax ring will keep your bathroom dry for a decade or longer.
Eliminate Phantom Flushes That Waste Water at 3 a.m.
You're lying in bed when the toilet suddenly runs for 15 seconds and then stops, as if someone flushed it. These ghost flushes happen when water leaks from the tank into the bowl just slowly enough to trigger the fill valve to top off the tank. The tank water level drops a fraction of an inch, the float sinks, and the valve runs briefly. That cycle can waste over 30 gallons a day without a single visible sign of a leak.
Drop a few drops of food coloring or a dye tablet into the tank water, don't flush, and wait 15 minutes. If color appears in the bowl, you have a silent leak. The most likely cause is a warped or mineral-crusted flapper that doesn't seat squarely. Clean the flapper seat with a scouring pad, and if the flapper itself feels stiff or shows cracks, replace it. Sometimes the chain is the culprit: a chain that's too short prevents the flapper from closing completely. Lengthen it so just one or two links hang slack when the flapper is seated.
If the dye test shows no leak but phantom flushes continue, check the refill tube. It should clip to the overflow pipe, but its end must sit above the water line. If it's shoved down into the overflow tube below the water level, it can create a siphoning effect that slowly drains the tank. Pull the tube up so it ends a half-inch above the pipe's rim. These two tweaks shut down 95% of phantom flush complaints, and they rarely take more than 20 minutes to perform.
Stop Tank Condensation That Drips Onto the Floor
In humid climates or during muggy summers, toilet tanks can sweat so heavily that water puddles on the floor and eventually rots the flooring beneath the vinyl. The physics is simple: cold water entering a warm, humid tank causes condensation—like a glass of ice water on a hot day. A sweating tank can produce up to half a gallon of drips per day in a poorly ventilated bathroom. You don't need to replace the toilet to fix it.
Install a toilet tank liner, which is a foam insulation kit that sticks to the inside walls of the tank. The kit costs around $20 and takes an hour to install because you have to drain the tank, dry it thoroughly, cut the panels to fit around the flush valve and bolts, and press them into place. The foam barrier prevents the tank's exterior from getting cold enough to condense moisture. If you'd rather not drain the tank, a drip tray that sits under the tank catches the water and keeps it off the floor—a $10 solution.
A longer-term approach is to install a tempering valve that mixes a small amount of hot water into the supply line, raising the tank water temperature just enough to block condensation. That job requires tapping into a nearby hot water line, so it's a bit more involved, but it permanently solves sweating in bathrooms that see heavy use. Start with the liner; it works for most homes and stops the drip problem in a single weekend.