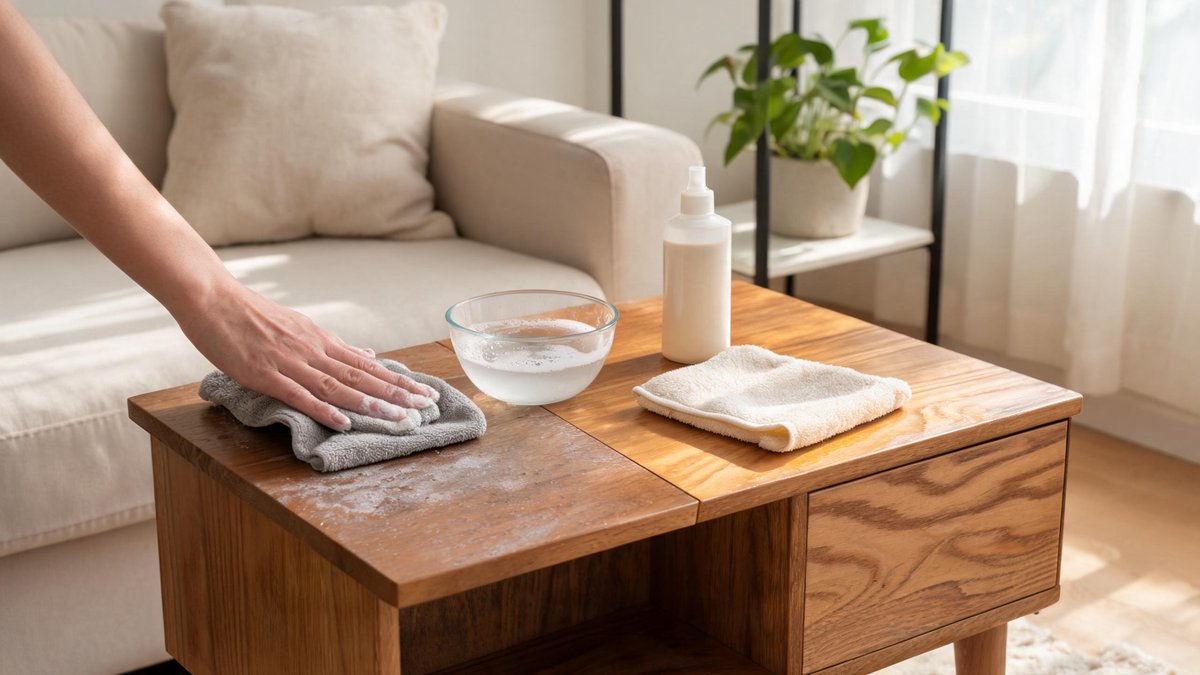
You've invested in gorgeous wood furniture—a dining table that anchors Sunday dinners, a dresser passed down from your grandmother, or a coffee table that draws compliments every time someone walks in. But wood doesn't stay beautiful by accident. It's a living material that expands, contracts, and ages with every change in your home's environment. Without a simple, consistent care routine, even the hardest oak or walnut can end up dull, scratched, and thirsty for moisture. The good news? You don't need a cabinetmaker's certification to keep wood surfaces thriving. You just need to understand what your furniture is made of, which products actually help, and which habits do more harm than good. In this guide, you'll learn exactly how to clean and maintain wood furniture properly, without guesswork or marketing fluff.
1. Know Your Wood Type Before You Touch a Cloth
You can't clean what you don't understand. Solid wood, wood veneer, laminate, and painted MDF all behave differently when they meet a damp cloth. Wipe a raw pine stool with a wet rag, and you'll raise the grain until it feels like sandpaper. Do the same on a sealed cherry buffet, and you'll just streak the finish. Before you buy a single cleaning product, take 30 seconds to identify what you're working with. Only about 15% of furniture sold today is crafted from solid wood; the rest is veneer over particleboard or MDF with a wood-patterned laminate. That's not a bad thing—veneers can be stunning and stable—but they need a lighter touch.
Open a drawer and look for exposed edges. Solid wood shows continuous grain across end cuts and seams. Veneer reveals a thin wood layer glued onto a different substrate, often visible at a joint. Laminate has a printed pattern under a clear plastic coating, and painted MDF looks uniform with zero grain. Once you know, tailor your approach. Solid wood tolerates occasional refinishing; veneer doesn't. MDF can't handle prolonged moisture at all. This first step eliminates 90% of the horror stories you see online about ruined tabletops. When in doubt, default to the gentlest method: dry dusting. You'll never harm a surface by removing grit with a soft, dry cloth. Save the liquids for the next stage.
2. The Daily Habit That Prevents 80% of Furniture Damage: Dry Dusting
Dust isn't just an eyesore. Those tiny particles of dead skin, fabric fibers, and soil act like micro-sandpaper every time you set down a coffee mug or slide a laptop across a desk. Over six months, unchecked dust can create a network of hairline scratches that dull even the most expensive lacquered finish. The fix is embarrassingly simple: a 15-second dry dusting session every other day. One study of household dust revealed that a single pass with a dry, high-quality microfiber cloth removes up to 90% of surface particles and airborne allergens that settle on horizontal wood surfaces. That means you're not just keeping furniture lustrous—you're improving the air you breathe while working from that desk.
Design Tip: The average US household loses 10,000 gallons of water annually to undetected toilet leaks. Put a drop of food coloring in the tank — if color seeps into the bowl without flushing, there is a leak.
Skip feather dusters. They scatter more particles than they collect and leave behind oily residues from the feathers themselves. Instead, use a plush microfiber cloth folded into quarters. Start at one edge and work in long, straight strokes with the grain, not against it. Don't press hard; let the electrostatic charge of the fibers do the work. For carved details, a soft-bristled brush—like a clean makeup brush or a dedicated furniture brush—works wonders. Turn it once a week into a quick sweep of all horizontal wood surfaces: tables, chair arms, nightstand tops. You'll be shocked how much less you have to deep clean when dust never gets to build up. Plus, you'll slash the risk of moisture damage because there's no need to frequently wet-clean a dirty surface.
3. How to Clean Wood Surfaces Without Ruining the Finish (And a Weekly Routine)
Dry dusting handles daily grit, but every week or two, your furniture needs a gentle wash—not a shower. The biggest mistake people make is reaching for an all-purpose spray cleaner. Most of those contain ammonia or alcohol, which can dissolve shellac, soften lacquer, and permanently cloud a finish within minutes. Even plain water can become the enemy. When wood fibers absorb H₂O, they swell. Repeated cycles of swelling and drying can raise the grain by up to 0.5 mm in a year, leaving you with a surface that feels permanently rough to the touch.
The solution is so mild it feels counterintuitive: a barely damp cloth with a drop of dish soap. Fill a bowl with lukewarm water and add literally one drop of a pH-neutral, grease-cutting liquid soap (castile soap works beautifully). Agitate the water, dip a microfiber cloth in, and wring it out until it's just shy of dry. You're aiming for a cloth that's damp like a wrung-out sponge after a full day, not dripping. Wipe a small section, following the grain, then immediately dry it with a separate, completely dry cloth. Never let moisture sit, because even sealed wood can absorb water through micro-cracks you can't see. For a weekly routine on a dining table used daily, wipe the top after dinner with the damp soap cloth, dry it instantly, and finish with a dry dusting pass. It takes under two minutes and preserves the topcoat for years longer than the average table endures.
If the wood feels slightly tacky or greasy—common near kitchens—add a teaspoon of white vinegar to the water bowl. The acid cuts through airborne cooking oil without harming most modern finishes. Always test on an inconspicuous spot first, like the inside of a chair leg. And never use vinegar on unsealed, waxed, or bare wood; it can etch the surface. For these cases, stick to a barely-there damp cloth with no additives.
4. Polishing Done Right: Why Less Is More and When to Skip It
Here's a secret many furniture manufacturers won't advertise: most wood furniture doesn't need polish. In fact, over-polishing is the single most common cause of sticky, cloudy buildup. Commercial aerosol polishes often contain silicone oils that promise instant shine but deliver a long-term mess. After two weeks, silicone-laden surfaces attract about 30% more dust than untreated ones because the film acts like a magnet for airborne particles. Worse, the buildup can prevent future re-oiling or waxing from penetrating the wood, making restoration a nightmare.
You should polish no more than two to four times a year. The right product depends entirely on your piece's original finish. Lacquered and polyurethane-coated surfaces (most post-1960s furniture) only need a mild rejuvenator that cleans and leaves a protective micro-layer, not a true wax. For oiled or waxed wood—often found on Danish modern teak or rustic farmhouse tables—a high-quality paste wax made from beeswax and carnauba is your best friend. Apply it with a soft cloth in a thin, circular motion, let it haze for five minutes, then buff it off with a clean flannel cloth. You're not trying to drown the wood; a coat thinner than a layer of lip balm is perfect. If you can see a paste trail as you apply, you're using three times too much.
Always skip polish or wax on surfaces that receive direct food contact unless the label explicitly states food-safe. Many waxes contain petroleum distillates you don't want near your morning toast. For butchers-block counters or untreated wood utensil trays, use food-grade mineral oil or a beeswax-oil blend designed for cutting boards. That simple swap keeps both your wood and your family safe. And remember the golden rule: a surface that looks dull is often just dirty. Try the damp cloth cleanse from section three first; you might find the natural glow returns without any polish at all.
5. Protecting Wood from Sun, Spills, and Scratches: Long-Term Care That Adds Decades
You clean and polish, but your biggest threats are invisible and silent. Ultraviolet light is wood's worst enemy. Direct sunlight can fade a walnut dining table by two to three shades in as little as one year. The damage isn't just cosmetic—UV exposure breaks down lignin, the organic polymer that holds wood fibers together, leading to micro-cracks and a brittle surface that's more prone to scratching. The fix is simple: keep all wood pieces out of direct sun, or rotate them if you can't rearrange the room. When rotation isn't possible, apply a UV-blocking film to your nearest windows. These transparent films block up to 99% of harmful rays without changing the light in your room, and they cost less than refinishing a single heirloom.
Spills demand instant action, but the right action. Never let a puddle sit while you grab your phone to Google a fix. Keep a stack of absorbent, white cotton cloths in a nearby drawer. When liquid hits wood, blot—don't wipe—immediately. Wiping spreads the liquid and drives it into seams and grain. Blotting lifts it. For stubborn sticky spills like juice or red wine, after blotting, use the damp soap method and dry thoroughly. White rings (often from water glasses) account for roughly 60% of all wood furniture damage claims. If you catch one early enough, you can sometimes remove it by gently heating the area with a hair dryer on the lowest setting, moving constantly. The heat re-emulsifies trapped moisture under the finish buffers. But prevention is always simpler: give every coffee table and nightstand a stable of coasters you actually enjoy using, and you'll never have to remember the hair-dryer trick.
Scratches and dents deserve a mention, too. Place felt pads under every accessory that sits on a wood surface—lamps, vases, speakers. Even a ceramic figurine can abrade a finish over time when vibration from footsteps shifts it microscopically. For dining chairs, check the feet monthly; worn-away plastic caps expose nails that carve ribbons into hardwood floors. Spending $8 on a pack of felt pads and rubber caps protects thousands of dollars in floors and furniture, and it's a quiet, satisfying upgrade you'll appreciate every time you slide a chair.
6. Quick Repairs for Common Wood Furniture Blemishes
No matter how careful you are, life happens. A belt buckle grazes a chair seat, a toy truck skids across a credenza, or a hot mug leaves a ghostly white ring. You don't always need professional restoration. Many common blemishes respond to low-risk DIY fixes that take minutes. Start with the least invasive method and escalate only if needed.
For light surface scratches that haven't penetrated the wood, reach for a walnut—yes, the nut. Rub the meat of a raw walnut over the scratch, working with the grain. The natural oils darken the exposed wood and fill micro-abrasions. Wait five minutes, then buff gently with a soft cloth. The result won't be invisible, but it'll reduce the contrast so the scratch stops catching your eye. For deeper scratches or watermarks that have penetrated the finish, a matching furniture marker or wax fill stick delivers a convincing cover-up. Choose a shade slightly lighter than your piece's overall tone; you can always add darker layers, but lightening is tough. Apply the wax, level it with a credit card edge, and buff.
White heat rings from hot dishes respond well to a gentle abrasive. Create a paste from equal parts non-gel toothpaste and baking soda, then rub it onto the ring with a soft cloth using tiny circular motions for about a minute. Wipe clean and assess. This works because the super-fine abrasive levels the very top layer of finish without cutting through to bare wood. But stop the moment the ring fades; you don't want to go too deep. When nothing works and the damage is severe, you're looking at refinishing. But those five-minute fixes? They'll rescue 9 out of 10 everyday mishaps, and keep your wood furniture looking maintained rather than marred.