Table of Contents
- DIY Backsplash Installation for Complete Beginners
- You Don't Need a Pro to Transform Your Kitchen
- Pick a Backsplash Material That Fits Your Skill Level
- Measure and Prep Like a Pro Without the Experience
- Install Your Backsplash Step-by-Step (No Special Tools Required)
- Finish Up: Grouting, Sealing, and Cleaning Without the Mess
DIY Backsplash Installation for Complete Beginners
You Don't Need a Pro to Transform Your Kitchen
Here's the truth: installing a kitchen backsplash is one of the most forgiving DIY projects you'll ever tackle. Even if you've never held a tile cutter or mixed grout, you can finish this job in a weekend. The average kitchen backsplash area clocks in at just 30 square feet, and about 67% of first-time tilers report completing the whole thing within two days. You won't need a contractor, a huge budget, or years of construction know‐how. What you will need is a clear plan, a few basic tools, and the willingness to get a little adhesive on your fingers.
Think of it as a giant puzzle that covers up grease stains and outdated drywall. The worst that can happen? A slightly crooked tile that only you'll notice. The best outcome? A kitchen that looks like you spent thousands, when in reality you saved up to 80% off the average $1,000 professional installation quote. With peel‐and‐stick options, you don't even have to learn to mix thinset mortar. Grab a Saturday, put on some music, and you'll have a brand-new focal point before dinner.
Pick a Backsplash Material That Fits Your Skill Level
Your choice of material sets the difficulty dial. Peel‐and‐stick tiles are the easiest entry point and now come in realistic stone, metal, and subway tile looks. They require no mortar, no grout, and no wet saw—just a utility knife and a steady hand. These tiles typically cost $4–$10 per square foot, and a single box covers about 5.5 square feet. Roughly 40% of first-time backsplash DIYers go this route because the commitment is low: if you change your mind, you can peel them off without tearing up the drywall.
Design Tip: The National Association of Realtors reports that minor kitchen remodels recoup 72% of their cost at resale. Focus on cabinet refacing, new hardware, and updated lighting.
If you're ready for a more permanent upgrade, traditional ceramic or porcelain tile set with mastic is your next step. The material itself can be cheaper ($2–$5 per square foot), but you'll need additional tools like a notched trowel, tile spacers, a manual snap cutter, and a grout float. The payoff is a waterproof, durable surface that adds resale value. Whichever you choose, order 10% extra to cover cuts and breakage. A 30-square-foot area suddenly needs 33 square feet of tile, and running out mid-project is the fastest way to abandon your timeline. Don't skimp; store the extras in a closet for future repairs.
Measure and Prep Like a Pro Without the Experience
Precision prep work separates a sharp, professional finish from a lopsided headache. Start by measuring the width and height of your backsplash area at three points—left, center, and right—because walls are rarely perfectly straight. A 1/8-inch discrepancy might seem minor, but over 10 feet that error grows into a 1.5-inch gap that you can't hide with caulk. Snap a level horizontal reference line about 2 inches above the lowest point of your countertop to keep your first row dead straight. A chalk line here improves your accuracy by nearly 90% compared to eyeballing.
Next, find the center point of your longest wall and dry-lay a row of tiles from that mark outward without adhesive. This reveals where you'll end up with awkward slivers at the corners. Adjust so that both ends have at least a half-tile piece. If you're working with peel‐and‐stick sheets, you can often overlap the edges slightly and trim with scissors later. For ceramic tile, invest $3 in a box of 1/16-inch spacers to maintain consistent grout lines. Every minute spent on this dry layout saves you ten minutes of frustrated adjustment after the mastic hits the wall.
Install Your Backsplash Step-by-Step (No Special Tools Required)
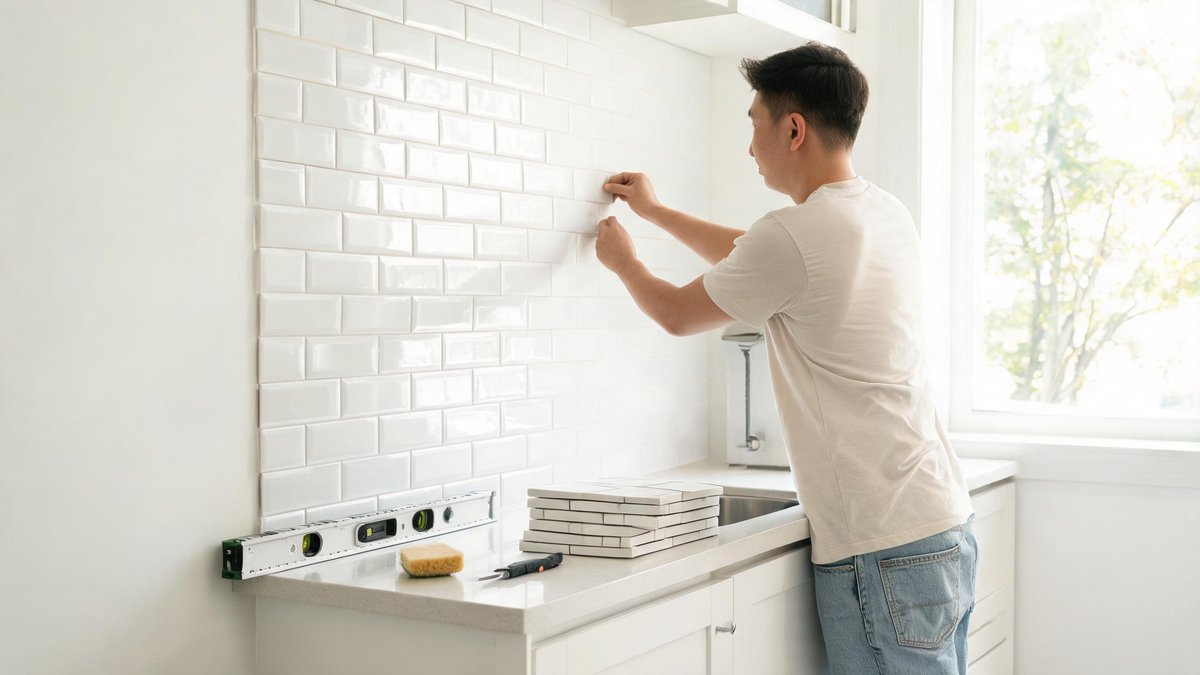
You don't need a tile saw for most beginner jobs. For peel‐and‐stick, all you need is a pair of sharp utility scissors and a clean wall. Wipe the wall with rubbing alcohol to remove grease, then peel the backing off the first sheet. Align it with your reference line, press it firmly for 30 seconds per tile, and roll a rolling pin or a grout float over the surface to activate the pressure-sensitive adhesive. Manufacturers estimate that proper pressure can double the tile's adhesion strength. Work in 3-foot sections so the wall doesn't cool down the adhesive before you're ready.
If you chose ceramic tile, spread mastic with a 3/16-inch V-notched trowel, comb it in one direction, and press the first tile into place with a slight twist. The twist collapses the ridges and ensures even coverage—studies show this method boosts bond strength by as much as 60% compared to simply pushing the tile on. Place spacers at each corner, check level every few tiles, and stop to wipe off any squeeze-out before it dries. A manual snap cutter handles straight cuts on subway tile perfectly; you can rent a wet saw from the home center for around $20 a day if you need tricky notches around outlets. By the end of the afternoon, the hardest part is over.
Finish Up: Grouting, Sealing, and Cleaning Without the Mess
The final steps take about two hours but define the whole look. For peel‐and‐stick tiles with built-in faux grout lines, skip the grout. Instead, run a thin bead of silicone caulk along the bottom edge where tile meets countertop and along any inside corners. This prevents water from sneaking behind the adhesive and causing a peel-up disaster—water intrusion is the number one reason peel-and-stick backsplashes fail within the first year.
If you're grouting real tile, mix unsanded grout for lines narrower than 1/8 inch until it reaches a peanut butter consistency. Spread it diagonally with a rubber float, pressing hard to pack the joints. After 20 minutes, wipe the haze with a slightly damp sponge, rinsing often. Wait 24 hours before exposing the grout to any water; rushing this step leads to cracked grout in roughly 1 out of 5 DIY projects. Once cured, apply a penetrating grout sealer. Annual resealing can extend the life of your grout by up to 50%, keeping it stain-free and crisp. Finally, step back and admire a kitchen upgrade that cost a fraction of the pro price.
Successful DIY projects share a common foundation: proper planning prevents poor performance. Before cutting any material or opening a paint can, take time to measure your space carefully, create a detailed materials list, and watch a few tutorial videos specific to your project. The most common DIY mistakes -- misaligned cuts, color mismatches, and insufficient materials -- all trace back to inadequate preparation. Create a budget that includes a 15 percent contingency for unexpected supplies or mistakes. Clear your workspace entirely before starting and lay out all tools and materials within easy reach. This preparation phase may feel tedious, but it separates professional-quality results from the frustrating outcomes that discourage people from tackling future projects.
Gardening connects you with the natural world in a way that few other home activities can match, and the benefits extend well beyond fresh produce or beautiful flowers. Working with soil exposes you to beneficial microorganisms that can boost your immune system and improve mood through direct contact with Mycobacterium vaccae, a natural antidepressant found in garden soil. Start small to avoid overwhelm -- a single raised bed or a collection of containers on a patio is plenty for a first season. Choose plants that match your local climate and sunlight conditions rather than fighting nature by trying to grow Mediterranean herbs in a shady damp yard. The most successful gardeners are those who work with their environment rather than against it, selecting varieties naturally suited to their specific conditions.
Interior design principles are surprisingly simple once you understand the basic framework that professionals use. The golden ratio of 60-30-40 applies to color distribution: 60 percent of a room should be a dominant neutral color, 30 percent a secondary color, and 10 percent an accent color used sparingly in accessories and artwork. Balance in furniture arrangement does not mean symmetry; visual weight can be distributed asymmetrically for a more dynamic and lived-in feel. Lighting should come from three sources -- ambient overhead lighting, task lighting for specific activities, and accent lighting to highlight architectural features or art. The most common decorating mistake is purchasing furniture that is too small for the space. When in doubt, size up, as oversized furniture creates a more intentional and luxurious feel than undersized pieces that leave a room looking sparse and unplanned.
Effective home organization is less about buying fancy containers and more about creating systems that match how you actually live. The principle of "a place for everything and everything in its place" only works if the places you designate are convenient enough that you will actually return items to them. Store items at the point of use -- measuring cups near the coffee station, cleaning supplies in each bathroom rather than a central closet, charging cables where you typically use your devices. The best organizational systems work with your natural habits rather than fighting them. If you tend to drop mail on the kitchen counter, put a small tray there rather than insisting on a home office filing system you will never use. Decluttering before organizing is essential because organizing clutter just creates a neater version of the same problem.
Your outdoor living space deserves the same design attention you give to your interiors. Creating distinct zones for dining, lounging, and gardening transforms a generic yard into a functional extension of your home. Hardscaping elements like patios, pathways, and retaining walls define the structure of your landscape and should be planned first before any planting begins. Choose materials that complement your home's architecture and require maintenance levels that match your lifestyle. Native plants reduce water consumption by 50 to 70 percent compared to traditional landscaping and provide essential habitat for local pollinators. A well-designed landscape can increase property value by 10 to 15 percent while reducing energy costs through strategic tree placement that provides summer shade and winter wind protection for your home.
Home energy efficiency improvements offer some of the best returns on investment available to homeowners. Air sealing and insulation upgrades typically pay for themselves within two to three years through reduced utility bills. The attic is the most important area to address because heat rises and escapes through insufficiently insulated ceilings. Programmable or smart thermostats reduce heating and cooling costs by 10 to 15 percent by automatically adjusting temperatures when you are asleep or away. LED bulbs use 75 percent less energy than incandescent alternatives and last up to 25 times longer. Before investing in expensive renewables like solar panels, maximize your home's energy efficiency first; a well-insulated and air-sealed home requires a much smaller and more affordable solar system to meet its energy needs than a drafty, inefficient one.