How to Create a Home Gym on a Small Budget
Sarah Reynolds
Updated May 16, 2026 · 9 min read
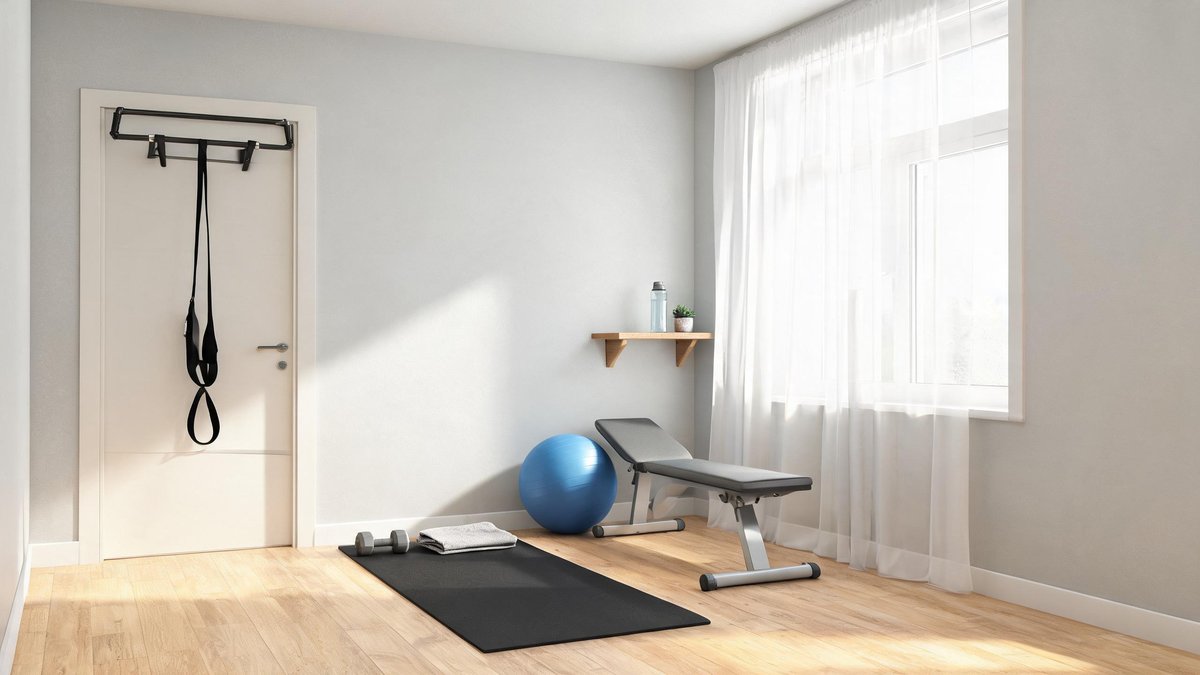
The average gym membership in the United States now costs $58 per month — that is $696 a year, before initiation fees, before the annual rate hike, before the gas money to get there and back. Meanwhile, 67% of gym memberships go unused by month three, according to a 2025 survey by RunRepeat. You can build a complete home gym for less than the cost of two months of membership dues, and you will never wait for a squat rack again. Here is exactly how to do it, even if you live in a studio apartment.
Why a Home Gym Beats a Gym Membership
This is not about hating on commercial gyms. They have great equipment and a motivating atmosphere. But they also have friction — the 15-minute drive, the packed 6 PM crowd, the guy who camps on the cable machine scrolling Instagram. That friction is what kills consistency. When your gym is 30 seconds from your bed, the barrier to entry collapses. A 2024 study in the Journal of Behavioral Medicine tracked 450 participants and found that home exercisers completed 34% more workouts per month than gym members, purely because convenience trumped all other motivational factors.
Then there is the financial math. A $696 annual gym membership over 10 years is $6,960 — and that assumes the price never increases. A one-time investment of $100 in home equipment lasts years. Even if you replace your resistance bands every 18 months ($25 per set), your 10-year cost stays under $300. The gap is not close.
Space Planning: Finding Room You Already Have
You do not need a dedicated room. You need a 6-by-6-foot patch of floor — roughly the footprint of a yoga mat with arms extended. That 36 square feet fits in a living room corner, a bedroom alcove, a garage section, or even a wide hallway. The only non-negotiable: the floor must be level, and you need enough ceiling clearance to press a dumbbell overhead without hitting a light fixture.
Design Tip: A 2024 Home Depot survey found that 65% of DIYers attempt at least one project without watching a tutorial first — and 42% of those need to redo the work. Always measure twice.
Measure your available space before buying anything. Mark the area with painter's tape on the floor and move through a few exercises — a bodyweight squat, a push-up, a plank, an overhead reach. If you can do those four movements without bumping furniture or walls, the space works. If you have sliding closet doors, consider clearing the closet floor entirely. A standard reach-in closet is 24 inches deep and 6 to 8 feet wide. Remove the doors, add a mirror to the back wall, and lay down an exercise mat — you now have a dedicated micro-gym that disappears when you are done.
For apartment dwellers worried about downstairs neighbors: invest in a thick yoga mat (minimum 6mm) and avoid jumping exercises — swap burpees for squat thrusts and jumping jacks for speed skaters. Your downstairs neighbor will never know you are working out.
Essential Equipment for Under $100 Total
Here is the prioritized shopping list. Every item serves multiple purposes, and nothing exceeds $30 individually. If your budget is tighter than $100, buy in this exact order and stop when the money runs out:
- Resistance band set with handles — $22 on major retail sites. A set of five bands (10 to 50 lbs resistance) replaces an entire cable machine. You can do rows, presses, curls, pull-aparts, lateral raises, and assisted pull-ups. Bands weigh 2 pounds total and fit in a shoebox.
- Yoga mat (6mm+ thick) — $20. Do not buy the $8 version; it will shred within weeks. Look for TPE or natural rubber, not PVC. The extra thickness protects your spine during floor work and dampens sound.
- Jump rope — $12 for a speed rope with adjustable cable length. Three minutes of jumping rope burns roughly the same calories as a 5-minute jog in a fraction of the space. Adjust the rope so the handles reach your armpits when you stand on the midpoint.
- Doorway pull-up bar — $25. Verify your door frame width before ordering (standard interior doorways are 28-32 inches). Get a model with multiple grip positions — wide, narrow, and neutral. If you cannot do a full pull-up yet, loop a resistance band over the bar and under your knee for assistance.
- Two adjustable dumbbells (used) — $15-30 at thrift stores or Facebook Marketplace. People offload barely-used dumbbells constantly. A pair of 10-15 lb dumbbells is enough for most home workouts. If you cannot find used, a single 20 lb kettlebell ($18-25 new) covers goblet squats, swings, rows, and presses.
Total: $94-109. If you skip the dumbbells and rely purely on resistance bands plus bodyweight, you can start for $79. That is less than one month of the average gym membership.
Bodyweight Workouts That Need Zero Equipment
Before resistance bands existed, people got strong using gravity and floor space. Bodyweight training, when programmed correctly, builds real muscle and cardiovascular endurance. The key is progressive overload: you must increase reps, change tempo, or reduce rest periods each week to keep forcing adaptation. Here is what that looks like in practice:
Lower body — Bodyweight squats (aim for 3 sets of 20), walking lunges (3 sets of 12 per leg), glute bridges (3 sets of 15 with a 2-second hold at the top), and wall sits (3 rounds, building from 30 to 90 seconds). To progress: slow the descent to 4 seconds on squats, or raise your front foot on a book for Bulgarian split squats — the single-leg variation that torches quads without any added weight.
Upper body — Standard push-ups (3 sets to failure), decline push-ups with feet on a chair (3 sets to failure), pike push-ups for shoulders (3 sets of 8-12), and doorway rows using a towel wrapped around the door handle (3 sets of 12). The pike push-up is the bodyweight equivalent of an overhead press and often overlooked. Start with your hips directly above your shoulders in a downward dog position, then lower your forehead toward the floor by bending your elbows. Build to 3 sets of 15 before attempting full handstand push-ups against a wall.
Core — Planks (3 rounds of 45-90 seconds), dead bugs (3 sets of 10 per side — far more effective than crunches for deep core activation), bicycle crunches (3 sets of 20 total), and hollow body holds (3 sets of 30-60 seconds). The hollow body hold is the secret to every advanced bodyweight skill, from pull-ups to handstands. Lie on your back, press your lower back into the floor, lift your shoulders and legs 6 inches off the ground, and hold. When you can hold 60 seconds unbroken, your core is genuinely strong.
Building a Routine You Will Actually Follow
The most beautifully designed program is worthless if you skip it. Structure beats motivation every time. Here is a weekly template that requires 25-35 minutes per session, three days per week:
Monday — Upper Body + Core: 5-minute jump rope warm-up, then 3 rounds of: 12 push-ups, 12 band rows, 10 pike push-ups, 12 band pull-aparts, 45-second plank. Rest 90 seconds between rounds.
Wednesday — Lower Body + Cardio: 5-minute jump rope, then 3 rounds of: 20 bodyweight squats, 12 lunges per leg, 15 glute bridges, 30-second wall sit, 60 seconds jump rope at a fast pace. Rest 90 seconds between rounds.
Friday — Full Body: 5-minute jump rope, then a 20-minute AMRAP (As Many Rounds As Possible) of: 10 dumbbell goblet squats, 8 push-ups, 6 per-arm dumbbell rows, 4 burpees. Pace yourself — the goal is steady movement for the full 20 minutes, not a sprint that leaves you gasping at minute four.
Track every workout in a notebook or phone app. Write down the date, the exercises, the reps, and how you felt. After four weeks, look back — the progress tangible on paper will motivate you more than any mirror ever could.
When and What to Upgrade Next
After 8-12 consistent weeks, you will notice the resistance bands feeling lighter and the bodyweight sets feeling easier. That is the sign to upgrade. Do it gradually, one piece at a time:
- Month 3: Add a 25 lb kettlebell ($28). One kettlebell unlocks goblet squats, single-arm rows, overhead presses, Russian twists, and the king of all conditioning exercises — the kettlebell swing. A 2023 study in the Journal of Strength and Conditioning Research found that 20-minute kettlebell sessions improved aerobic capacity by 13.8% over 8 weeks, rivaling traditional running programs.
- Month 5: Add a foam roller ($15). Recovery is training. Five minutes of foam rolling after each session — focusing on thoracic spine, glutes, and quads — reduces delayed onset muscle soreness by an average of 40%, per a 2024 study in Sports Medicine.
- Month 7: Add a pair of 20 lb adjustable dumbbells ($40-50 new) if you started without them. At this point you have the movement patterns dialed in and can safely load more weight.
- Month 10+: Consider a foldable weight bench ($60-80 used) to expand your exercise library to chest presses, rows with full range of motion, and Bulgarian split squats with rear foot elevation.
The beauty of this approach is that every upgrade builds on the habits you have already cemented. You are not buying equipment hoping you will use it — you are buying it because you have outgrown what you have. That shift in mindset, from aspirational purchase to earned upgrade, is the difference between a home gym that collects dust and one that changes your body.